Introduction
Today blockchain is one of the most popular technologies available given the security and reliability it offers users. Based on these factors, there is a significant chance that it become the standard in many industries. Therefore, any blockchain-integrated ecosystem is equally likely to become a future industry standard as well. It’s public, but protected; it’s decentralized and secure, all these properties make blockchain very attractive compared with other technologies.
Many experts believe that Blockchain technology is the missing link that can address security, privacy and reliability concerns in the Internet of Things. It can be used to track billions of connected devices and enable the processing of transactions and coordination between devices. It would allow for significant savings to IoT industry manufacturers. This decentralized approach would eliminate single points of failure, and create a more resilient ecosystem for devices. The cryptographic algorithms Blockchains use would also significantly enhance protections for consumer data and ensure privacy.
The Devicehive plugin management system makes it possible to create and enable your own components to implement custom business logic. Let’s talk about how DeviceHive can be integrated with blockchain technology.
The purpose of the demo
Let’s use Blockchain technology as immutable storage for DeviceHive time-series data. The plugin can be used to provide smart contracts with data, automate payments between devices (e.g. if your device is fully charged and able to sell electricity back to the power grid), build a decentralized database, orchestrate trust across the network and more.
We’ll create a Smart Contract and send special notifications of the features to DeviceHive. The plugin will consume them, parse and execute SC functions with specified parameters.
Before beginning
First we need an ethereum node running somewhere, which includes the ethereum account’s address and password. To start a local development node, follow these instructions:
- Download and install geth.
- Open terminal and run geth –mine –minerthreads=1 –networkid=1999 –rpc –rpcaddr “127.0.0.1” –rpcapi=”admin,debug,miner,shh,txpool,personal,eth,net,web3″ –dev
- Open another terminal window and run geth attach http://localhost:8545
- In the second window run personal.newAccount()and enter your password. You will get the account’s address. Save it and your account password for the future purposes.
- Make sure you have enough ethereum. You can run eth.accounts.forEach(function(account){if(account!==eth.coinbase){eth.sendTransaction({from:eth.coinbase,to:account,value:web3.toWei(1000000)})}})to increase it on your account. You will see undefinedin response. It means that transaction has been finished successfully.
- You can always check your account balance by entering web3.fromWei(eth.getBalance(${ACCOUNT_ADDRESS}), “ether”)command.
Now, when you have your ethereum node up and running on localhost, we can proceed with DeviceHive plugin setup and configuration.
Plugin initial setup
For demo purposes you can use the DeviceHive Playground instance or you can run DeviceHive services locally (detailed instructions for running the docker-compose version can be found here).
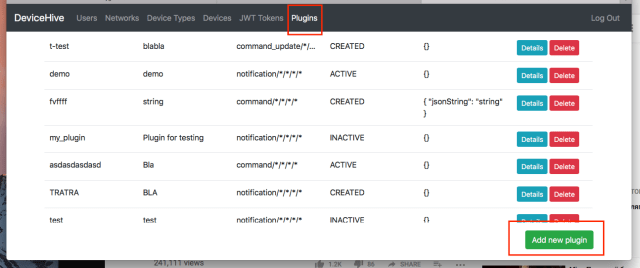
Open the DeviceHive Admin panel, navigate to ‘Plugins’ page, click ‘Add new plugin button’.
Enter the plugin name and description and specify what data you want to store inside your blockchain. If everything is ok, you’ll see plugin credentials: access and refresh tokens, and the topic name. You will need them for the next step.
Ethereum configuration
Clone this repository. Go to./ethereum-config.json. Check default ETHEREUM_URLvalue and change one if needed. Also, you’ll need to specify ACCOUNT_ADDRESS and ACCOUNT_PASSWORD. Before writing data to the blockchain, a smart contract should be created.
The plugin allows you to create a Smart Contract automatically. By default, it will start with an example smart contract from ./example/contracts/counter.sol. You can change it by editing the CONTRACT_PATH config value and by specifying the path to your own smart contract.
Please note, by default all methods from the smart contract are forbidden for DeviceHive use. In order to change this, you’d specify all open-to-use functions in the ALLOWED_METHODS config. In the example, config functions from counter.sol are described. If you want to use your own smart contract, please note this parameter as well.

After successful creation of the contract, the plugin’s parameters will be overwritten. They will store the ethereum node url, the contract address, allowable methods, and the initial transaction’s hash and will be available on the DeviceHive Admin Panel.
All available smart contract configuration options are available here.
Plugin configuration
Now let’s look at the plugin configuration.
Open ./config.json. Add PLUGIN_TOPIC and PLUGIN_REFRESH_TOKEN(orPLUGIN_ACCESS_TOKEN) values.
Change DEVICE_HIVE_PLUGIN_WS_ENDPOINT, DEVICE_HIVE_AUTH_SERVICE_API_URL and DEVICE_HIVE_MAIN_SERVICE_API_URL if needed.
Also add USER_REFRESH_TOKEN (or USER_ACCESS_TOKEN), which you can copy from the playground. The plugin core provides different authentication options that are described here.
You can also specify plugin filter properties such as what type or names of data to consume and handle (notifications, commands or command updates). If you PLUGIN_PROPS.OVERRIDE value to TRUE, all these configs will override the initial ones (specified on plugin creation from the Admin Panel).
Other configuration options are described here.
Plugin run and test
To start the plugin, just open a terminal from the root directory and execute:
- npm i
- npm start
Then open the DeviceHive Admin Panel and send notification/command from the device that corresponds to your plugin’s filters. If you started the plugin with default parameters, the message name should be
blockchain-record
andwithparameters
{ “method”: “increase”, “args”: { “amount”: 1 }, “options”: {} }
Wait until the plugin receives the message and sends the transaction to the blockchain. The logger will notify you of the results. You will see following message:
Transaction has been passed successfully, hash: ${transactionHash}.